1. Creating an Organization
The heart of Locals Planner are the organizations in a community. Locals Planner is meant to blend seamlessly into an organization's website and create a network of such planners within a community. This tutorial is meant to describe the process by which an organization is registered and embeds a planner on their site.
Register as a user
To begin with, an organization must have an 'owner' on Locals Planner. This means if you intend to register an organization on Locals Planner, you must first register as a user.
Create the organization
Once registered, you may create the organization which you intend to embed. To create your first organization, click the "Embed" link found at the top of any planner. If you haven't yet, you will be asked to login or register.
In the embed dialog, you will be presented with a list of your existing organizations. If this is your first time, you will only see the "Locals Planner - Generic" option. Directly below this, you will see a link titled, "Add New Organization." Click this to begin adding an organization.

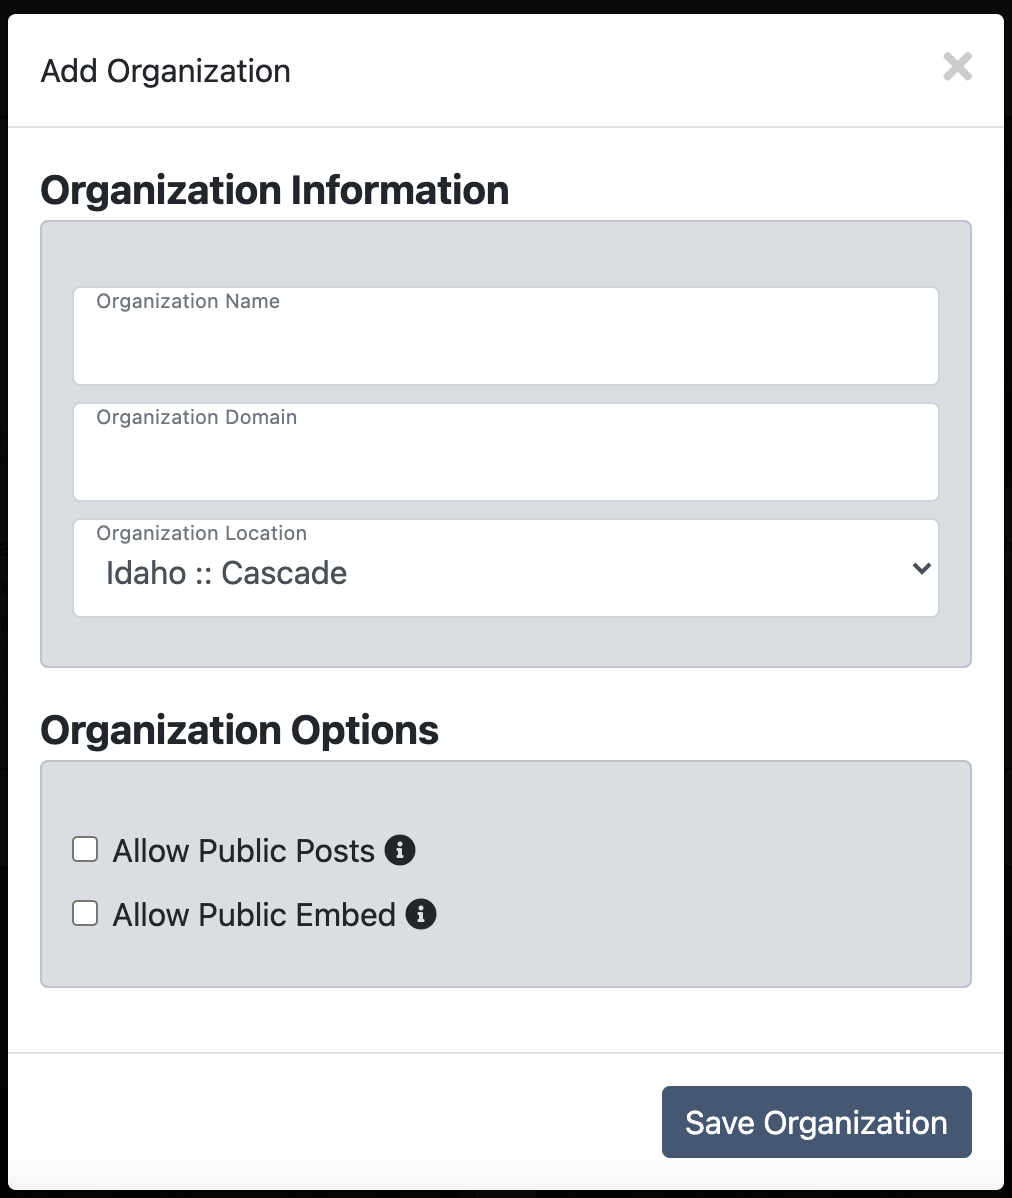
You will be presented with the above dialog. In this dialog, you will add the organization name, the website where the organization will be embedded, and the locality of the organization.
Note: If your locality is not yet listed on Locals Planner, you may open a ticket requesting your town be created!
Additionally, there are two options for each organization created:
- Allow Public Posts
This checkbox allows the public to submit posts to your organization. All posts submitted will need to be approved by you or your staff before being associated with your planner. - Allow Public Embed
This checkbox allows partner organizations to embed your planner with their planner on their website. This allows you to post to your planner while also posting to any partners who have embedded your planner with theirs.
Once you have completed the dialog, you may click the "Save Organization" button to confirm the organization's creation on Locals Planner.